SAN-Zertifikat von öffentlicher Zertifizierungsstelle erstellen lassen?
 Um also mehrere Server- bzw. Dienstnamen in einem Zertifikat einzubinden, erstellt man ein spezielles Zertifikat, welches um das Datenfeld Subject Alternative Names erweitert wird. Öffentliche Zertifizierungsstellen (Certificate Authority, CA) bieten u.a. Webformulare an, in denen man alle benötigten Namen angibt. Die CA erstellt aus den Angaben den Certificate Signing Request (CSR) sowie den Private Key und signiert das neue Zertifikat. Der private Schlüssel ist streng vertraulich, da mit diesem die Entschlüsselung von Daten erfolgt.
In diesem Szenario besitzt die Zertifizierungsstelle sowohl den öffentlichen als auch den privaten Schlüssel des Zertifikats. Die Sicherheit und Vertraulichkeit ist dadurch nicht mehr gewährleistet. Der private Schlüssel ist vor Zugriffen Dritter, also auch vor Zugriffen öffentlicher Zertifizierungsstellen, zu schützen.
Zertifikatsantrag (CSR) und Private Key besser selbst erstellen
Vertraulichkeit und hohe Sicherheitsansprüche sind gute Gründe den CSR, und damit den privaten Schlüssel, selbst zu erstellen. Betreibt man eine eigene, interne PKI, bspw. mithilfe Microsofts AD CS, wird man gelegentlich CSR für interne Dienste bzw. Server erstellen müssen. Im Folgenden wird beschrieben, wie man diese CSR zum Ausstellen neuer Zertifikate mit Windows Bordmitteln recht einfach erstellt. Das Verfahren ist nicht ausschließlich auf SAN-Zertifikate beschränkt, sondern kann auch zum Beantragen von Wildcard- und Single Name-Zertifikaten angewandt werden.
Zertifikatsspeicher
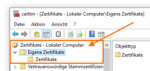
Der Zertifikatsspeicher des lokalen Computers.
Zertifikate werden in unterschiedlichen Bereichen aufbewahrt. Es gibt den zentralen Zertifikatsspeicher des Computer. Die in diesem Speicher abgelegten Zertifikate können sowohl von Programmen, Diensten sowie von allen Benutzern des Computers genutzt werden. Zum Verwalten dieser Zertifikate sind jedoch Administratorberechtigungen erforderlich. Die Management Konsole des Computer Certificate Store ruft man über Start –> Ausführen –> certlm.msc auf.
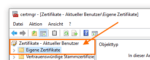
Der Zertifikatsspeicher des angemeldeten Benutzers.
Jeder Benutzer besitzt seinen eigenen Certificate Store. Auf den benutzerspezifischen Zertifikatsspeicher hat nur der jeweilige Anwender Zugriff. Für die Verwaltung der eigenen Zertifikate sind keine administrativen Berechtigungen erforderlich. Die Management Konsole des eigenen Zertifikatsspeicher startet man über Start –> Ausführen –> certmgr.msc auf.
CSR erstellen
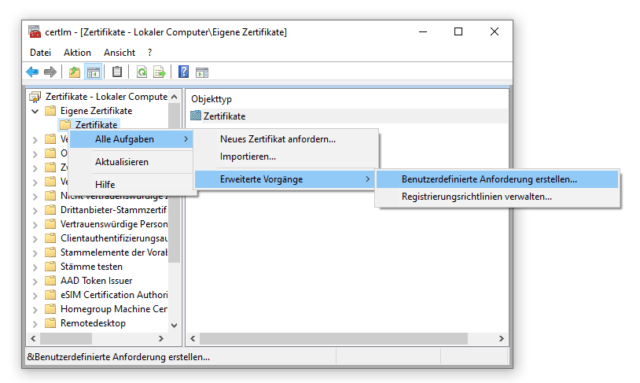
Um den CSR direkt auf dem Windows Gerät zu erstellen, auf dem das neue Zertifikat eingesetzt werden soll, verwendet man idealerweise die Zertifikatsverwaltung des Computers: certlm.msc. Generiert man den CSR stellvertretend, um das Zertifikat nach Erstellung zu exportieren und weiterzugeben, reicht die eigene, benutzerbezogene Zertifikatsverwaltung, da sie keine erhöhten Rechte anfordert: certmgr.msc
Für ein SAN-Zertifikat muss eine benutzerdefinierte Anforderung (Custom Request) erstellt werden.
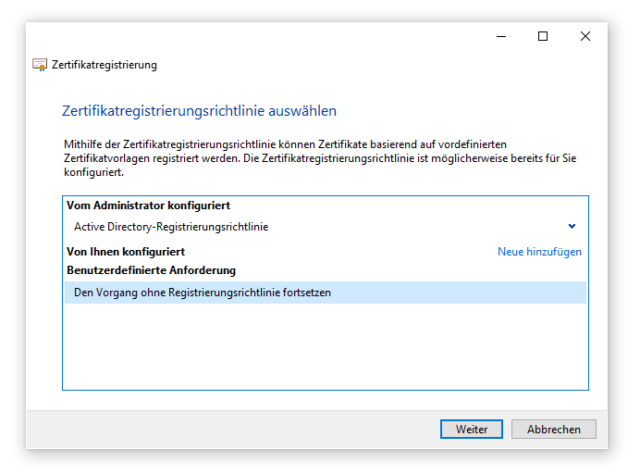
Nach dem Start des Assistenten, führt man den Vorgang ohne Registrierungsrichtlinie fort. Active Directory-Registrierungsrichtlinien werden über Gruppenrichtlinien (GPO) verwaltet und stellen in der Regel einfache Benutzer- oder Computerzertifikate aus. Diese Richtlinie ist für unsere Zwecke nicht ausreichend.
Sowohl die Wahl der Crypto Engine CNG, als auch das Format PKCS sind vorausgewählt.
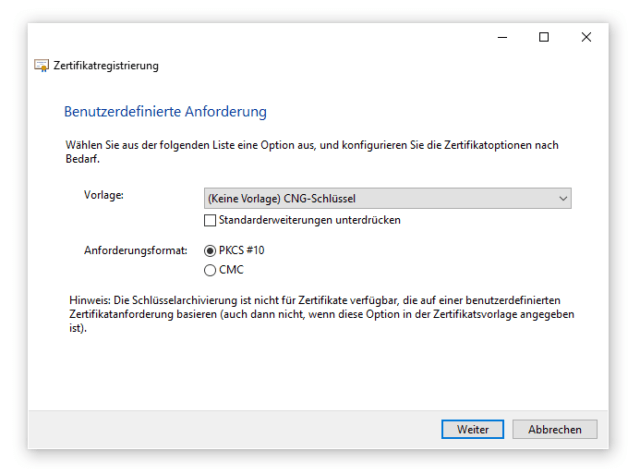
Den CSR konfiguriert man über Eigenschaften, die durch einen Klick auf Details erscheinen.

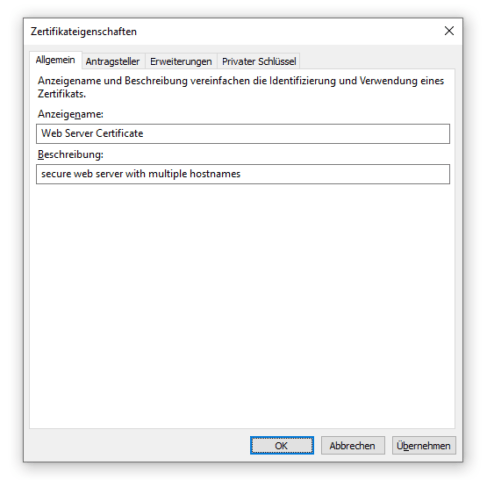
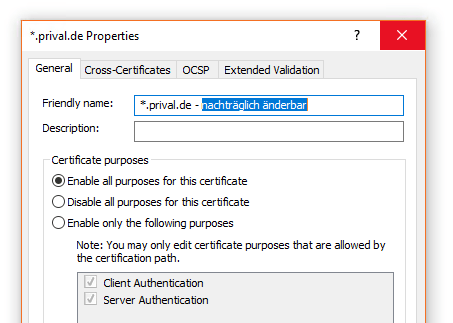
Sowohl Anzeigename als auch Beschreibung dienen der besseren Übersicht, haben üblicherweise keine technische Relevanz und können frei gewählt werden.
Hinweis
Es gibt vereinzelt Anwendungen die den Anzeigenamen nutzen, um Zertifikate zu identifizieren. Beispielsweise greift der Office Online Server auf dieses Feld zurück, um ein Wildcard-Zertifikat einzubinden. Der VMware Connection Server erfordert gar den vordefinierten Wert vdm als Anzeigename, um das richtige Zertifikat zu erkennen, was bei einem Zertifikatswechsel zu beachten ist.
Diese Eigenschaften lassen sich jederzeit nachträglich in der Zertifikatsverwaltung anpassen.
Jetzt sind alle relevanten Daten einzugeben. Üblicherweise gibt man als Common Name (Allgemeiner Name) den DNS-Namen an, unter dem der Dienst öffentlich erreichbar ist. Hinzu kommen Angaben zum Ort bzw. Stadt (L=Location), Land/Region (C=Country), was nicht zu verwechseln ist mit (Bundes)Land (S=State). Des Weiteren sind die Angaben Organisation (O), die verantwortliche Organisationseinheit (OU), in der Regel die IT-Abteilung, und die E-Mail-Adresse eines Kontakts. Übliche Kürzel, bspw. Länderkennungen, sind erlaubt.
 Die alternativen Namen werden im unteren Abschnitt eingetragen. Neben DNS kann man auch die IP-Adressen eintragen.
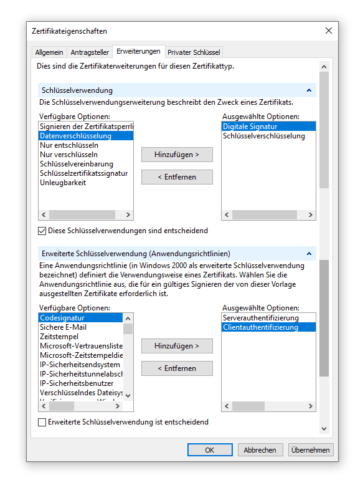
Welchen Zweck ein Zertifikat erfüllt, gibt man im Reiter Erweiterungen unter Erweiterte Schlüsselverwendung (Anwendungsrichtlinien) an. Für ein Serverzertifikat ist die Option Serverauthentifizierung auszuwählen. Oftmals wird Zertifikaten zusätzlich die Option Clientauthentifizierung hinzugefügt, über die sich ein Server anderen gegenüber als Client authentifiziert. Diese Option ist aber nicht erforderlich.
Bei der Angabe Schlüsselverwendung handelt es sich um Einschränkungen der Verwendung des Zertifikats auf die ausgewählten Optionen. Typischerweise erforderlich für ein Serverzertifikat ist Digitale Signatur, oft in Kombination mit Schlüsselverschlüsselung, was bedeutet, dass der Schlüsselaustausch nur mit Schlüsselverschlüsselung zugelassen ist. Diese Angabe ist optional und wird ggf. durch die signierende CA gesetzt.
Die Auswahl und Konfiguration der Cipher Suite erfolgt im Reiter Privater Schlüssel. Je nach Verwendungszweck und Laufzeit des Zertifikats, ist ein geeigneter Algorithmus mit entsprechender Schlüssellänge zu wählen. Nach wie vor häufig im Einsatz ist RSA. Bei Verwendung von RSA sollte der Schlüssel mindestens 2048, besser 4096 Bit lang sein. Neuere Alghorithmen, bspw. auf Basis elliptischer Kurven wie ECDH, kommen mit kleineren Schlüsseln aus.
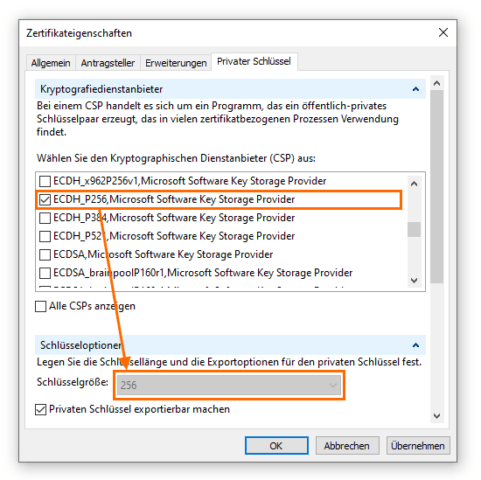
Der Kryptografieanbieter, per default RSA, kann ausgewählt bleiben. Damit verstehen sich die meisten Programme. Möchte man die Sicherheit hochschrauben, greift man zu neueren Cipher Suiten mit Elliptic Curve Cryptography (ECC). Das Perfect Forward Secrecy Verfahren stellt sicher, dass verschlüsselte Kommunikation nicht zu entschlüsseln ist, da sich mit jeder neuen Session der Session Key ändert.
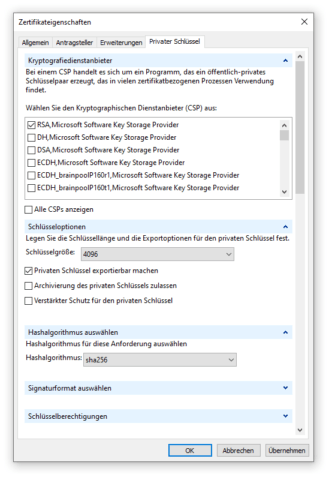
Der Hashalgorithmus sollte unbedingt auf SHA-2 basieren, SHA-1 und MD5 sind unsicher, auf sie sollte man komplett verzichten. In der Praxis werden die Algorithmen SHA-256, SHA-384 und SHA-512 verwendet, aktuelle Browser und Geräte unterstützen SHA-2. Muss das Zertifikat exportiert werden, ist der private Schlüssel als exportierbar zu kennzeichnen.
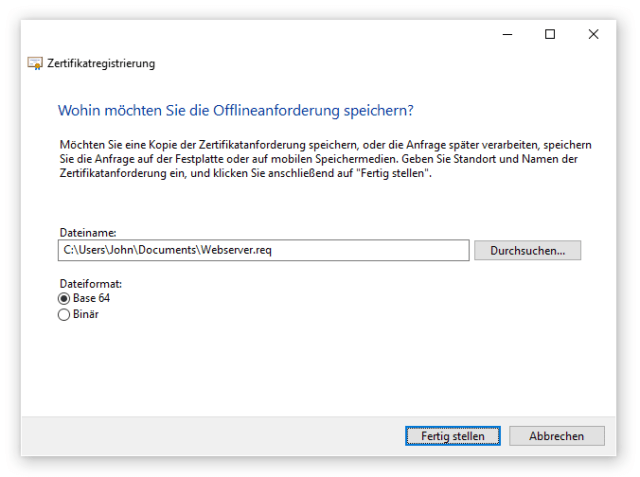
Nach der Angabe aller Daten, schließt und speichert man die Anforderung ab.
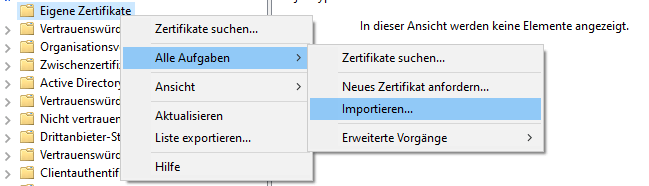
Den CSR schickt man nun der CA. Der CA Administrator prüft und signiert den Request, um diesen in Form eines Zertifikates zurückzusenden. Dieses Zertifikat muss auf dem Gerät importiert werden, auf dem der CSR erstellt wurde. Und der Import erfolgt in den zuvor genutzten Zertifikatsspeicher. Denn nur dort liegt der generierte private Schlüssel des Zertifikats.
Windows ordnet den privaten Schlüssel automatisch dem zugeordneten Zertifikat zu. Ob ein Schlüsselpaar komplett ist, zeigt sich in den allgemeinen Informationen des Zertifikats durch ein Schlüsselsymbol.

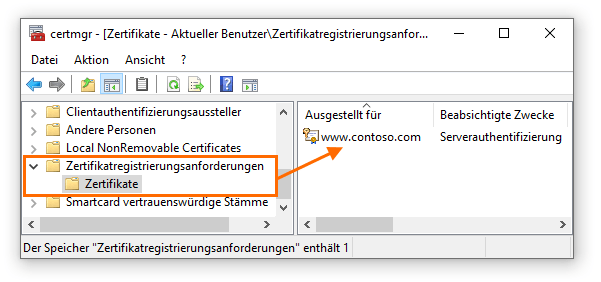
Offene, nicht abgeschlossene Anforderungen sind in der Zertifikatsverwaltung im Abschnitt Zertifikatregistrierungsanforderungen zu finden.
Zertifikat über Microsoft Zertifikatsdienste (AD CS) ausstellen
Als Verwalter einer internen PKI oder als Berechtigter zur Ausstellung von Zertifikaten, geht man mittels Browser auf das Web Interface der eigenen CA (https://ca-server/certsrv/). Auf der Webseite klickt man auf Request a certificate.

Anschließend navigiert man zur Anforderungseite über den Link Submit a certificate request[…].

Den kompletten Inhalt des CSR, die Datei kann mit jedem Texteditor geöffnet werden, überträgt man in das Formular, wählt die gewünschte Zertifikatsvorlage aus und schickt die Anfrage ab.

War der Vorgang erfolgreich, wird das signierte Zertifikat zum Download angeboten, welches dann an den Anforderer zurückgeschickt oder importiert werden kann.
Alternativ zum Web Enrollment, können CSR direkt über die CA Managenment Konsole oder mittel certreq.exe signiert werden.
Weiterführende Informationen
Wikipedia: Public-Key-Infrastruktur
Microsoft: Active Directory Certificate Services Overview
Technet: Active Directory-Zertifikatdienste
Technet: AD CS Step by Step Guide: Two Tier PKI Hierarchy Deployment
Technet: Cross-Forest Certificate Enrollment using Certificate Enrollment Web Services
Technet: Active Directory Certificate Services (AD CS) Clustering
Microsoft: PKI Blog Archive
Certutil.exe
Certreq.exe